Today we got our hands on one of the newest 3D printers from the Flashforge lineup, the Flashforge Guider 3. The Guider 3 is the latest addition to the Guider series and in this blog we will be putting it head to head with its predecessor the Guider IIs V2, and comparing the differences to find out whether it is worth upgrading to the Guider 3 or if it's better to stick with the much loved Guider IIs V2.
There's quite a few differences between these two printers to cover so to make it easier I have segmented this comparison into 4 categories.
1. Size
2. Hardware
3. Filament
4. Printer Interface
Size
The first thing you'll notice is that both boxes are fairly large in size. The Guider IIs V2 box is also cube like whereas the Guider 3 box is taller and more rectangular.

Once the printers are out of the box, you get a better idea of the size difference and as you can see here the Guider 3 is indeed taller. The Guider IIs V2 measures in at 550 x 490 x 570mm and the Guider 3 measures in at a slightly taller 496 x 436 x 696mm.

The general rule of thumb with 3D printers is a bigger printer means a bigger build size and that hasn't changed here. The Guider IIs V2 has a max build volume of 280 x 250 x 300mm and the Guider 3 has a slightly bigger max build volume of 300 x 250 x 340mm.

Despite the Guider 3 having a bigger build size, both machines have the same size build plate which is very surprising!
Hardware
On the topic of build plates, the Guider IIs V2 comes with 1x flexible build plate which is standard on most newer Flashforge 3d printers. The Guider 3 on the other hand has one upped its predecessor with not only 1 but 2 build plates, the standard flexible build plate and a glass build plate which is used for printing specialty filaments.

Flashforge has also upgraded the design structure with the Guider 3 opting for a CoreXY structure instead of the widely popular Cartesian design. CoreXY structures use a belt system that moves in different planes from the moving print head, which reduces the moving mass when printing objects, resulting in a lightweight gantry system that can travel at faster speeds. According to Flashforge this allows the Guider 3 to achieve high-speed printing of 250mm/s saving you 30-50% off your printing time. CoreXY structures also typically result in higher quality prints.
The Guider IIs V2 on the other hand uses a Cartesian structure which utilises 3 axes X,Y and Z to move the print head as well as the bed in a linear motion. Cartesian 3D Printers are generally easier to setup and use, which is something to keep in mind when comparing these printers.

Another upgrade Flashforge has made is the extruder. The Guider IIs V2 uses a direct drive extruder design paired with brass nozzles that have a max temp of 300 degrees celcius. Direct drive extruders are mounted on the print head and use a toothed gear and an unpowered idler wheel or roller to support and push the filament directly into the hot end. Since a direct extruder is mounted to the print head, the motor can easily push filament through the nozzle, helping to reduce extrusion-related issues.
The Flashforge Guider 3 uses a new dual gear extruder design paired with steel nozzles that have a max temp of 320 degrees celcius. Dual drive extruders use two toothed gears that grip onto the filament and push it into the hotend. This design allows more force to be applied to the filament through the nozzle decreasing print times as well as reducing skipped steps and filament grinding which can sometimes be an issue with direct drive extruders. A dual geared extruder is useful for printing all types of filaments but it is a must-have for printing flexible filaments. Another benefit of this dual drive extruder design is that it makes removing and replacing nozzles a lot easier.

Another nice upgrade in my opinion is the filament spool holder. The Guider IIs V2 uses a plastic external spool holder which sits on the back of the 3D printer, whereas the Guider 3 has an internal metal spool holder on the side. This allows for easier access to the filament and eliminates the need to reach around the back of the printer.

Filament
Out of the box, each printer comes with a 1kg spool of standard PLA which is great to see as the Adventurer 3 which featured in our last 3D printer comparison, only came with a 250g spool despite its 500g capacity.
The Guider IIs V2 with its high temp extruder, can print using the following filament types; PLA, ABS, HIPS, PETG, PC and ASA.
The Guider 3 on the other hand can print the same filament types as the Guider IIs plus more! We believe it is due to the new dual gear feeding system and full metal hot end however it has not been confirmed by Flashforge. The additional filament types are PA, PA-CF, PLA-CF, PETG-CF and PETG-GF.

Printer Interface
Straight away you will notice a big difference in the menus for these printers. The Guider IIs V2 has its menu split into 3 sections, Build, Preheat and Tools, the Guider 3 on the other hand has its menu split into 5 tabs, Build, Filament, Preheat, Tools and Settings which in my opinion is a great upgrade as it makes finding the exact setting you are trying to update or change a lot easier.

Both printers have three parts to the levelling. On the Guider IIs V2 you will find Extruder Calibration and Auto level on the second page of the settings menu, however to find the third part 'level' you will have to navigate to the tools section. The Guider 3 fixes this and has its three options together under one tab, this can be found by selecting the tools tab and hitting Calibration. You will be met with the 3 options; Z-Axis Calibration, Sensor Calibration and Assist Calibration.

The printers also both have inbuilt cameras that can be accessed through Flashforge Cloud or Polar Cloud. While the Guider IIs V2 camera can only be accessed with Flashforge Cloud or Polar Cloud, the Guider 3 has a section on the second page of the tools tab, allowing you to access any stored photos or time-lapses from the camera which will appear after a successful print. Please note that in order for footage to be captured, you will need either the photo or Time-Lapse options enabled.

There are a lot of settings that have been moved into separate tabs so if you are after a full list then I would recommend giving our comparison video on YouTube a look as we go into quite a bit of detail.
Conclusion
After comparing the two machines I can confidently say that the Flashforge Guider 3 lives up to all of our expectations. It looks great, is easy to use, incorporates Flashforge's latest features, offers a larger print size with impressive speeds, and produces great quality prints.
This still begs the question though, should you upgrade to the Guider 3?
If you're after a reliable printer at a low price point and speed isn't a big factor for you then I would recommend sticking with the Flashforge Guider IIs V2.
If you're after a reliable printer with some great quality of life upgrades, that produces high quality prints in a short amount of time and don't mind spending a little bit more then I would definitely recommend upgrading to the Flashforge Guider 3.
Watch the Videos!
|
Check out the comparison video on our youtube channel here. |
Check out our unboxing and setup of the Guider 3 on our youtube channel here. |


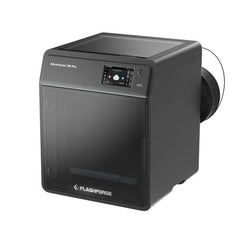
 Flashforge Adventurer 5M Pro 3D Printer -
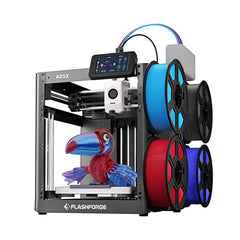
  Flashforge Adventurer 5X (AD5X) 3D Printer -
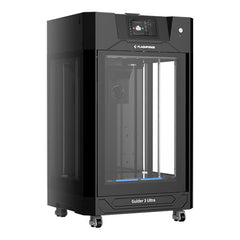
  Flashforge Guider 3 Ultra Dual Extruder 3D Printer -


