It all comes down to this…
The battle of two heavy weights.
In the red corner we have the Flashforge Adventurer 3 3D printer with its minimalistic, compact and user-friendly design versus the challenger—please give it up folks, for the new and improved, significantly larger, Flashforge Adventurer 4.
Ok so it’s not quite ‘fight of the century’ material but this head-to-head will answer the burning question so many keen Flashforge fans are wondering…
Is the Adventurer 4 a Worthwhile Upgrade Over the Adventurer 3?
The Flashforge Adventurer 3
The Flashforge Adventurer 4
Here at CD Soft we’ve put both machines to the test, comparing each model based on design, set up, price, and overall printing capabilities. It’s important to choose a printer that works right for you and will help satisfy your printing needs, and today we’ll help you work out which of these two printers tick your boxes.
So sit back, relax, and let us filament you in on everything you need to know.
Round 1: Design
Size
The Flashforge Adventurer 4 3D printer from an aesthetic standpoint comes fully enclosed in a sleek, robust black design measuring in at 500 x 470 x 540mm. Significantly larger than the Adventurer 3 it has clear panels situated on the top and sides of the unit, offering great visibility, with a clear plastic door on the front for accessing the print bed.
The implementation of a door covering the filament reel is a welcome addition protecting the filament reel from outside air and other undesirable elements.

As a larger unit, the Adventurer 4 also boasts a larger print bed than its predecessor, allowing users access to a larger print volume. Coming in at 220x200x250mm, the Adventurer 4 provides more room to move when creating those larger prints. The Adventurer 3 measuring in at 150x150x150 is still great for those small to medium prints but has its limitations.
HEPA Filter
The Flashforge Adventurer 4, like the 3, has a fan that blows the air out and removes a portion of the fumes that linger inside the printer. However the Adventurer 4 is now fitted with a HEPA filter, which allows you to continue printing till your heart’s desire without consuming excess fumes or smelling out the room. This makes the Adventurer 4 much more suited to printing ABS out of the box, as a well-ventilated room is no longer a strict requirement.
A HEPA filter can be purchased as an additional upgrade for the Adventurer 3, however it is not included in the base price.
Automated Levelling
Both units feature automated levelling systems commanding more accurate results during calibration. This is not specific to moving the bed itself but by calculating the offset differences on the bed via a 9-point levelling calibration process available through the printer’s interface.

Magnetic Build Plate
The print beds on each unit are flexible and removable so you can easily detach the bed and bend it to remove your print. Where the Adventurer 4 differs from the 3 is the new design feature on the build plate. The build plate now runs via magnets designed to allow you to easily detach your prints from your unit. A small tug of the magnets will allow the print bed to detach and let you remove your print. When ready to reattach, simply drop the print bed back to the platform. The magnets also act as an automatic leveller, reducing the need to recalibrate.

Dual Y-Axis Rail System
The last major design feature we will touch on is the inclusion of a dual y-axis rail system in the Adventurer 4. An issue with the Adventurer 3 was a lack of stability in the print bed when printing. At times the nozzles or filament would get stuck on the model mid-print; causing the print bed to tilt and alter your model. The dual y-axis rail system on the Adventurer 4 holds your print bed firmly in place, eliminating any further movement.
Round 2: Price
The Flashforge Adventurer 4 is considerably more expensive than the Adventurer 3, with the price tag almost double at just under $1300. While the Adventurer 3 is more suited towards those just starting out in the 3D printing world, the Adventurer 4 is a great entry level printer for hobbyists and enthusiasts looking to take the next step and create larger, more complex prints while still offering great progression into more advanced printing.
The Adventurer 4 is considerably larger, comes with a variety of added features and is compatible with a larger range of filaments—the HEPA filter makes all the difference in where, and when, you can print with ABS. Although the Adventurer 4 is more expensive than some of the other more entry level printers on the market, it is also a more advanced system, providing a more affordable price tag than some of the other pro-level 3D printing options available. For a printer that will take you from brand-new beginner through to seasoned expert, it’s actually fantastically priced.
Round 3: Setup
Assembly
Both the Flashforge Adventurer 3 and 4 are relatively easy to assemble. Each unit takes approximately 10-15 minutes to set up from start to finish. Once removed from the box, load up the filament provided into the printer and begin the calibration process. To maintain accuracy when printing, a 9-point levelling calibration is advised when first powering up each unit. Once this process has been completed, your printer will calculate any structural inconsistencies to your print bed and adjust for them while printing.
Nozzles
The Adventurer 3 comes with a standard 240°C nozzle while the Adventurer 4 comes with two options – a 240°C nozzle and a 265°C nozzle. The 265°C nozzle is a major drawcard as it allows you to print with a wider variety of different material types. Both nozzle types come in two different sizes each; a 0.3 mm for 240°C, a 0.4 mm for 240°C, a 0.4 mm for 265°C and a 0.6 mm for 265°C.

The 265° is available for purchase separately, and can be used with the Adventurer 3. This upgrade gives it the same printing capabilities as the Adventurer 4 out of the box, however is not included in the base purchase of the machine.

Filament Spool Size
The Adventurer 3 comes with a measly 250g spool of filament to get you started in comparison to the 1kg provided with the Adventurer 4. This is a little disappointing considering the Adventurer 3 has a max capacity of 500g. Once these starter spools are finished, both printers are compatible with a wide range of filament spools.

Filament Compatibility
Due to the addition of a 265°C nozzle, the Adventurer 4 is compatible with a larger range of filament materials than the Adventurer 3 straight out of the box, however if you choose to purchase the nozzle separately for the Adventurer 3, the filament compatibility field is levelled.
Compatible materials can be seen below:
Adventurer 3 (With Only the 240° Nozzle):
PLA
ABS
Adventurer 4 (and the Adventurer 3 With the Optional 265° Nozzle):
PLA
ABS
PC
PETG
PLA-CF
PETG-CF
ASA

Final Round: Overall Print Capability
Print Materials
A combination of interchangeable print nozzle options and a heated print bed allow the Adventurer 4 access to a wide range of print materials. The Adventurer 4 features print nozzles that can withstand up to 265°C, along with a print bed that maxes out at 110°C. This allows users access to both the standard and more complex materials options.
The standard 240°C nozzle that comes with the Adventurer 3 allows you to use popular materials like PLA and ABS but limits the use of other options, and while still a great printer, this factor will limit your progression. Of course, you can purchase this nozzle separately, however the extra costs do quickly add up—making the Adventurer 4 an even more appealing option!
Print Quality
The Adventurers 4 produces great quality prints. We had minimal issues printing any of the test pieces provided with printing speed that’s about standard in comparison to similar models. The only slight inconvenience we discovered, which was present for both Adventurer printers, was when printing with PLA, stringing became present around the test model. However, this can easily be removed with a sharp cutting tool, such as a hobby knife.
The Adventurer 3 provides good quality prints but is limited to only PLA and ABS. At times with more complex models, prints can suffer from adhesion issues around the edges and unwanted layering lines. The size of your prints is also substantially smaller on the Adventurer 3 due to the smaller print bed sizing in comparison to the Adventurer 4.
And the Winner of the Flashforge Adventurer 3 Vs Adventurer 4 Showdown Is…
The Adventurer 3 is still an excellent low-cost printer for beginners and perfect for entry-level and simple printing. Although limited to only ABS and PLA filament and a lot smaller in size, it will still perform exceptionally well for its price point.
The Adventurer 4 on the other hand serves as a stepping stone towards more professional level printers and comes in as an entirely different beast altogether. The Adventurer 4 fixes most of the issues we had with the Adventurer 3 and is for both the entry-level 3D modeller, and enthusiasts looking to take the next step in their 3D printing journey. If you are new to the scene, or just testing the waters, the Adventurer 3 is certainly worth a look and is a great starting unit for its price. For those more seasoned 3D printing enthusiasts looking to upgrade and tackle larger, more complex models, the Adventurer 4 is more suited to you.
When it comes down to it, our verdict lies with the Flashforge Adventurer 4. While it is more expensive, in the long run it will be a better investment if you’re serious about 3D printing. Its capabilities do quite exceed the Adventurer 3, and as you’ve seen there’s more than a little difference between the two. If you want a 3D printer that is easy to learn and get started, but won’t hold you back when you want to take things further, the Flashforge Adventurer 4 is for you.


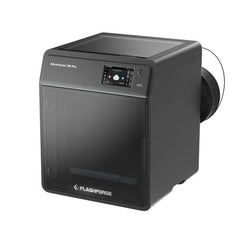
 Flashforge Adventurer 5M Pro 3D Printer -
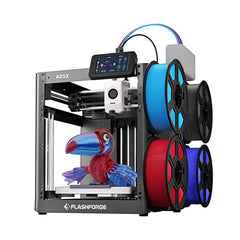
  Flashforge Adventurer 5X (AD5X) 3D Printer -
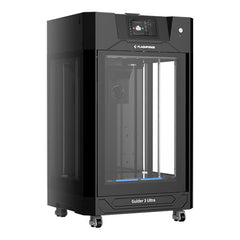
  Flashforge Guider 3 Ultra Dual Extruder 3D Printer -


