With the release of the new Flashforge Adventurer 4 3D Printer, it has left us asking one question; 'Will the Adventurer 4 be replacing the Adventurer 3?'
In this blog I will compare and talk about the main differences between the two machines so you for yourself can decide whether this a replacement printer or just an upgrade. To make things easier I have seperated the main differences in to 5 categories.
1. Size
2. Hardware
3. Filament
4. Printer Interface
5. Printing
Size
Right away you can already see a massive difference in the size of the two machines. Its not just the size either, the Adventurer 4 also weighs over 2x more than the Adventurer 3.

There are two main reasons as to why it's so much bigger.
1. The build size has been increased with the Adventurer 4, it now has a max build size of 220 x 200 x 250mm as opposed to the Adventurer 3s max build size of 150 x 150 x 150mm.
2. To accompany its increased build size, Flashforge has also added a larger spool holder allowing the use of 1kg spools so you can print for longer without the need to change spools.
Hardware
The Adventurer 4 gets rid of the slide in and slide out build plate and has replaced it with a new magnetic, flexile and easily removable build plate. This allows you to get prints out and removed from the build plate in just 5 seconds.

On the Adventurer 3, one of the big issues was during prints, if the nozzle was to get caught on the project it would cause the bed to tilt due to its single railed y axis. Having noted this issue, the Adventurer 4 was given a dual rail y axis system now making it impossible for that to ever happen again.

One of the great features that the Adventurer 3 brought to the 3D printing world was its easy interchangeable nozzle, the new nozzle design made replacing the nozzle or removing it for cleaning so much quicker and easier. Thankfully they have kept this design and have been able to improve it which I will touch on in the next section.
The last main hardware change to touch on is the new filament cover that replaces the removable cover used on the Adventurer 3. The adventurer 3s cover can be a real pain to line up. They have changed it to a nice hinged door that you simply swing open and close again without the need of lining it up.

Filament
As I mentioned before the spool size has been increased to allow the machine to carry 1kg spools as opposed to the Adventurer 3 which could only carry 500g spools.
Upon receiving your machine, you are supplied with one spool of filament to get you started right away. The adventurer 3 comes with a 250g spool of transparent red PLA filament which I found pretty disappointing due to its 500g capacity. With the Adventurer 4 on the other hand I was surpised to see that they include a 1kg spool to match its 1kg capacity.

The old nozzles had a maximum temperature of 240ºC meaning that users were limited to printing with only ABS and PLA, the Adventurer 4 however, comes stock with a 240ºC nozzle, but it also comes with a 265ºC nozzle that opens the possiblilities to printing a variety of different materials, such as PLA, ABS, PC, PETG, PLA-CF and PETG-CF.
Note: Also available for purchase seperately soon are the 0.3mm 240ºC and 0.6 265ºC nozzles.

Interface
There are a couple of new features in the printers interface that stand out from the rest. First up there is a fresh new look to the design/layout of the menu which is a welcome one, sporting some new menu items and moving some of the other settings around to more suitabe locatons.
With the addition of the new nozzle types the menu adds a new nozzle selection option. With small pictures and some text it displays the different nozzles available and allows you to add the nozzle temperature calibration after selection making the nozzle switch an easier process. This has since been added to the Adventurer 3 also, as the 0.4mm 265ºC Nozzle is now compatible with it as well.

Not only on the Adventurer 3 but all the previous Flashforge 3D printers, one thing that was always a bit irritating was viewing the nozzle temperaures during cool down. Unless you were in the monitor section of the menu the only guage you had for temperature was an image in the top right corner of the display showing either a red thermometer, orange thermometer or a green one, notifying you that it is now safe to touch. Now on the Adventurer 4 they have added next to the picture the currrent temperature so that you can see exactly what temperature it is giving youa much better idea of how long until it is safe to touch.

And lastly I'll talk about the onboard camera. All the latest printers now feature an onboard camera, the Adventurer 3 included. What the Adventurer 4 improves on is that you now have the possibility of taking pictuers from your printer and viewing them all on the printers screen.
Both the Adventurer 3 & 4 are supposed to have a live feed function that you can use websites like Flashcloud and Polarcloud to view, however due to current security risks on the websites, this is not currently useable.
Conclusion
In conclusion, does the Adventurer 4 repalce the Aventurer 3?
No, the Adventurer 3 is still an excellent, low cost printer for beginners and perfect for mass printing in schools.
The Adventurer 4 on the other hand is a different beast and in my opinion fixes all of the things I didn't like about the Adventurer 3 and serves as a stepping stone to proffesional level printers.
So if you're just starting your printing journey and are looking for a low cost, easily maitainable and good quality printer, get an Adventurer 3. If you are more exprerienced, looking for a larger and easily maitainable printer that hasn't got a price tag as big as the more proffesional printers like the Guider IIs and Creator 3, get an Adventurer 4.
Watch the Videos!
|
Check out our comparison video on our youtube channel here. |
If you want to have a look at the unboxing of the Adventurer 4 then you can check that out on our youtube channel here. |


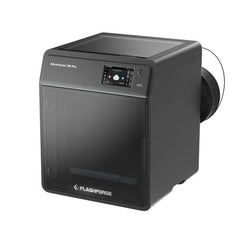
 Flashforge Adventurer 5M Pro 3D Printer - $759.00 inc GST
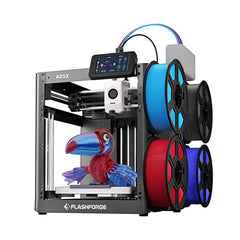
 Flashforge Adventurer 5X (AD5X) 3D Printer - $599.50 inc GST
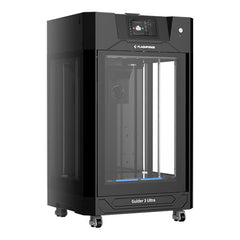
 Flashforge Guider 3 Ultra Dual Extruder 3D Printer - $4,990.00 inc GST


